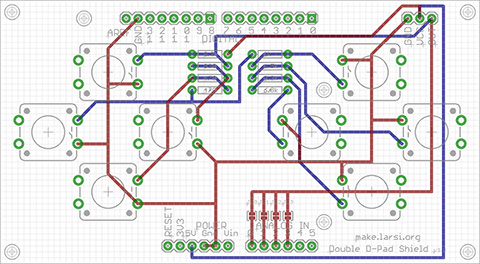
The source code and Eagle files are available from my local download.
Parts List
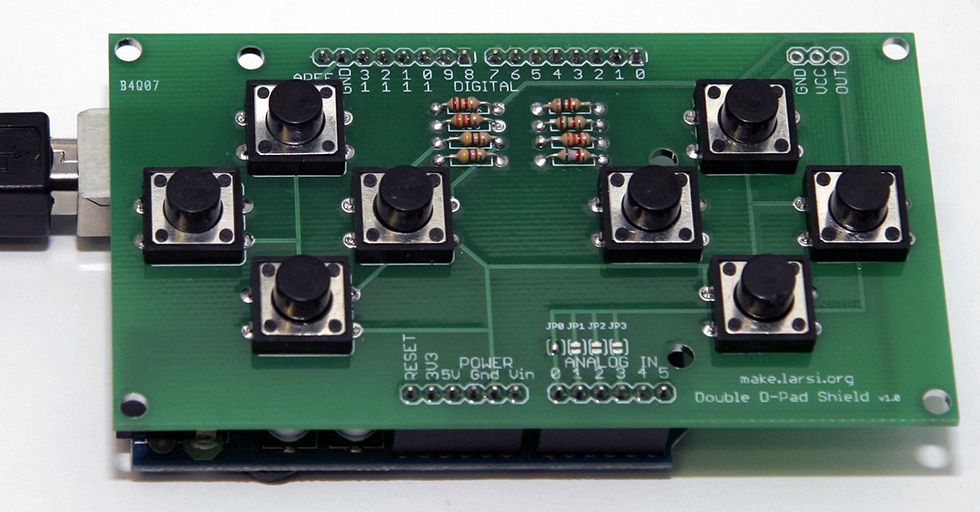
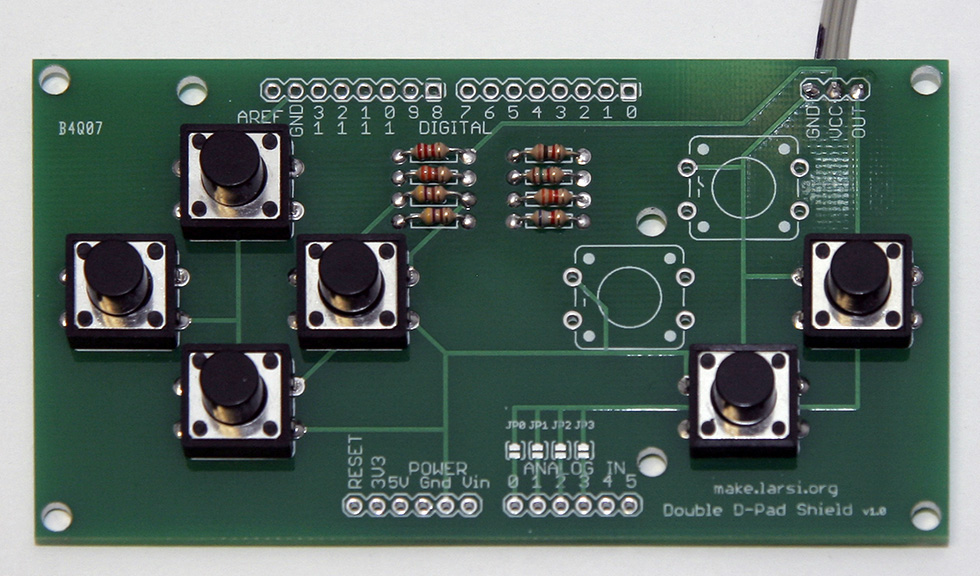
After I finished a working prototype I created an Arduino shield.
| 8 | Momentary Push Button Switch | generic 12mm (I ordered from SparkFun) |
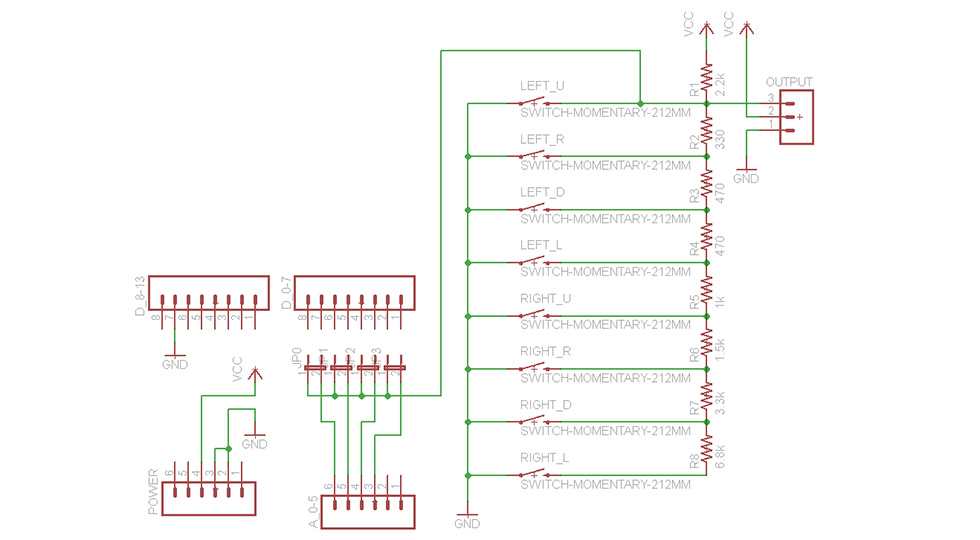
| 1 | Resistor | 330Ω orangeorangebrowngold |
| 2 | Resistor | 470Ω yellowpurplebrowngold |
| 1 | Resistor | 1kΩ brownblackredgold |
| 1 | Resistor | 1.5kΩ browngreenredgold |
| 1 | Resistor | 2.2kΩ redredredgold |
| 1 | Resistor | 3.3kΩ orangeorangeredgold |
| 1 | Resistor | 6.8kΩ bluegrayredgold |
| 1 | PCB | board and schematic |
 |
|
 |
 |
Arduino Code
| Button Down | Resistor | Total Resitor | Voltage | Analog Read | Rounded |
|---|---|---|---|---|---|
| none | ∞ | ∞ | 5.00 | 1023 | 8 |
| left up | 0 | 0 | 0.00 | 0 | 0 |
| left right | 330 | 330 | 0.65 | 133 | 1 |
| left down | 470 | 800 | 1.33 | 273 | 2 |
| left left | 470 | 1270 | 1.83 | 374 | 3 |
| right up | 1000 | 2270 | 2.54 | 520 | 4 |
| right right | 1500 | 3770 | 3.16 | 646 | 5 |
| right down | 3300 | 7070 | 3.81 | 780 | 6 |
| right left | 6800 | 13870 | 4.32 | 883 | 7 |
Here is the Arduino source code for the shield (check out the download section):
const byte PIN_BUTTONS    = 0; // buttons on analog pin 0

const byte BUTTON_L_UP    = 0;
const byte BUTTON_L_RIGHT = 1;
const byte BUTTON_L_DOWN  = 2;
const byte BUTTON_L_LEFT  = 3;
const byte BUTTON_R_UP    = 4;
const byte BUTTON_R_RIGHT = 5;
const byte BUTTON_L_DOWN  = 6;
const byte BUTTON_R_LEFT  = 7;
const byte BUTTON_NONE    = 8;

byte readButtons()
{
  //return (NUM_BUTTONS * analogRead(PIN_BUTTONS) + 512) >> 10;
  return (analogRead(PIN_BUTTONS) + 64) >> 7;
}